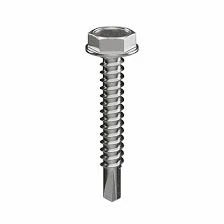
butterfly clips for drywall
Understanding Butterfly Clips for Drywall A Comprehensive Guide
When tackling drywall installation or repairs, many tools and materials come into play, each serving a specific purpose. Among these, butterfly clips are an essential component valued by both professionals and DIY enthusiasts. This article delves into what butterfly clips are, their applications, installation process, and benefits, ensuring a thorough understanding of their role in drywall projects.
What are Butterfly Clips?
Butterfly clips, also known as drywall clips or hangers, are small metal fasteners designed to assist in the installation of drywall. They’re shaped somewhat like a butterfly, which is how they got their name. These clips are typically made of galvanized steel to prevent rusting, ensuring durability over time. Their primary purpose is to secure drywall sheets to existing structures, such as studs or ceiling joists.
Applications of Butterfly Clips
Butterfly clips are predominantly used in residential and commercial drywall installations. Their main applications include
1. Hanging Drywall Butterfly clips facilitate the fastening of drywall to the framing, ensuring that panels stay in place during and after installation. 2. Repairing Existing Drywall When repairing damaged drywall, these clips can help secure new pieces to the surrounding structure. 3. Creating a Flush Surface When installing multiple sheets, butterfly clips help create a seamless appearance, as they can help align the edges of drywall panels.
Installation Process
Installing butterfly clips is a straightforward process that can be completed with minimal tools. Here’s a step-by-step guide
butterfly clips for drywall

2. Measuring and Cutting Drywall Measure the area where the drywall will be installed and cut the drywall sheets to size. Ensure a snug fit against existing structures.
3. Positioning the Butterfly Clips Place the butterfly clips at regular intervals along the edges of the drywall panel. Generally, spacing them every 12 to 16 inches offers optimal support.
4. Securing the Clips Use a screwdriver to fasten the butterfly clips to the framing. Make sure they are tightly secured to avoid any movement.
5. Hanging the Drywall Once the clips are in place, lift the drywall sheet into position, aligning it with the clips. Press the drywall against the clips and ensure it’s level.
6. Finishing Touches Secure the drywall further by driving screws through the panels directly into the framing, providing extra stability.
Benefits of Using Butterfly Clips
Using butterfly clips comes with several advantages
- Ease of Use Their design allows for quick and easy installation, even in tight spaces. - Increased Stability These clips provide additional support, reducing the risk of sagging drywall over time. - Cost-Effective Butterfly clips are inexpensive yet highly effective, making them a practical choice for both small and large projects. - Durability Made from galvanized steel, they resist corrosion and provide long-lasting support.
Conclusion
Incorporating butterfly clips into drywall projects can significantly enhance the overall quality and durability of installations. Their ease of use and stability make them a popular choice among both professionals and do-it-yourselfers. Whether you’re hanging drywall for the first time or conducting repairs, understanding and utilizing butterfly clips will ensure a smooth and successful project. So next time you find yourself working with drywall, consider the invaluable role these simple yet effective clips can play!
-
Weatherproof Plastic Expansion Anchors for OutdoorNewsJun.06,2025
-
Sustainability in the Supply Chain: Eco-Friendly TEK Screws ProductionNewsJun.06,2025
-
Load-Bearing Capacity of External Insulation FixingsNewsJun.06,2025
-
Double Head Bolts: Enhancing Efficiency in Industrial MachineryNewsJun.06,2025
-
Corrosion Resistance in Chipboard Screws: Coatings for Wholesale DurabilityNewsJun.06,2025
-
Butterfly Toggle Bolts : Enhancing Structural ResilienceNewsJun.06,2025
