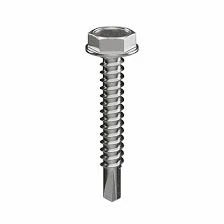
Guide to Properly Install a Wedge Anchor for Secure Fixation
Installing a Wedge Anchor A Step-by-Step Guide
Wedge anchors are essential fasteners that provide a secure method for anchoring objects to solid concrete. They are widely used in construction projects, from securing machinery and railings to mounting shelves and fixtures. Installing wedge anchors can seem daunting, but with the right tools and a systematic approach, it can be a straightforward process. This guide will take you through the steps necessary for a successful installation.
Tools and Materials Needed
Before beginning the installation, gather the following tools and materials
- Wedge anchors of the appropriate size - Hammer drill - Suitable drill bit (typically a carbide-tipped masonry bit) - Torque wrench (if specified by the manufacturer) - Safety goggles - Dust mask - Vacuum or brush (for cleaning) - Socket or wrench (as per the anchor size)
Step 1 Choose the Right Anchor Size
Selecting the correct size of wedge anchor is crucial for a secure hold. The diameter and length of the anchor depend on the weight of the object you are securing and the thickness of the material you are anchoring into. Consult with manufacturer guidelines or refer to load charts for proper sizing.
Step 2 Mark the Drilling Location
Once you have determined the correct size of the wedge anchor, mark the drilling locations on the concrete surface. Ensure that the marks are evenly spaced and correctly aligned with the object you intend to secure.
Step 3 Drill the Hole
Using a hammer drill fitted with the correct-sized masonry bit, drill holes into the marked locations on the concrete. The depth of each hole should be at least 1/2 inch deeper than the length of the wedge anchor to accommodate the anchor's expansion. As you drill, wear safety goggles and a dust mask to protect yourself from debris.
Step 4 Clean the Holes
installing a wedge anchor

After drilling, it is crucial to clean the holes to remove any dust or debris. Use a vacuum to clear out the dust or a brush to ensure that the holes are free from any obstructions. Proper cleaning enhances the holding power of the wedge anchor.
Step 5 Insert the Wedge Anchor
Take your wedge anchor and insert it into the hole. Make sure to leave a small portion of the anchor exposed, as this will be used to secure the item you are anchoring. The amount of anchor that remains visible will vary based on your specific application.
Step 6 Tighten the Anchor
Using a socket or wrench, tighten the nut on the exposed portion of the wedge anchor. As you tighten, the expansion clip at the end of the anchor will expand against the sides of the drilled hole, securing the anchor in place. Be cautious not to over-tighten, as this can damage the concrete or anchor.
Step 7 Check for Stability
After you have installed the wedge anchor, check its stability. You can do this by applying a slight force or tugging on the anchored item. If the anchor feels solid and does not shift, you have successfully completed the installation.
Step 8 Repeat as Necessary
If you are using multiple wedge anchors for a project, repeat the above steps for each additional anchor. Maintain consistent spacing and alignment to ensure that the anchors provide balanced support.
Conclusion
Installing a wedge anchor is a simple yet effective way to ensure that your fixtures and machinery are securely fastened to concrete surfaces. By following the steps outlined above, you can achieve a professional-grade install that will stand the test of time. Remember to always prioritize safety by wearing appropriate protective gear and ensuring that your workspace is clear. Proper installation not only secures your objects but also enhances the overall integrity of your project. Whether you are a seasoned contractor or a DIY enthusiast, mastering the art of wedge anchor installation is a valuable skill in any construction toolkit.
-
Weatherproof Plastic Expansion Anchors for OutdoorNewsJun.06,2025
-
Sustainability in the Supply Chain: Eco-Friendly TEK Screws ProductionNewsJun.06,2025
-
Load-Bearing Capacity of External Insulation FixingsNewsJun.06,2025
-
Double Head Bolts: Enhancing Efficiency in Industrial MachineryNewsJun.06,2025
-
Corrosion Resistance in Chipboard Screws: Coatings for Wholesale DurabilityNewsJun.06,2025
-
Butterfly Toggle Bolts : Enhancing Structural ResilienceNewsJun.06,2025
