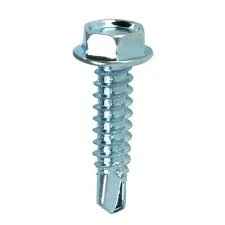
installing a wedge anchor
Installing a Wedge Anchor A Step-by-Step Guide
Wedge anchors are one of the most reliable types of concrete fasteners used for heavy-duty applications. They are designed to provide a secure hold in solid concrete, making them ideal for anchoring equipment, structures, and fixtures. This article will guide you through the process of installing a wedge anchor correctly, ensuring a strong and reliable connection.
What You Need
Before you begin, gather the necessary tools and materials
1. Wedge Anchors Choose the correct size and length based on your project needs. 2. Drill A rotary hammer drill is recommended for concrete drilling. 3. Masonry Bit Ensure the diameter matches the anchor size. 4. Hammer For setting the anchor after drilling. 5. Wrench or Socket To tighten the nut on the anchor. 6. Safety Gear Safety goggles and gloves.
Step-by-Step Installation Guide
Step 1 Determine Anchor Size and Spacing
Before installation, determine the appropriate size of the wedge anchor you need based on the load requirements and the thickness of the fixture you’re securing. Check the manufacturer's guidelines for load ratings. Also, consider the spacing between anchors to ensure effective load distribution.
Step 2 Mark the Drill Holes
Position the fixture you wish to anchor securely against the concrete surface. Use a marker or a pencil to mark the drilling points through the fixture's pre-drilled holes. Ensure your markings are level to avoid misalignment.
Step 3 Drill the Holes
installing a wedge anchor

Using the masonry bit, drill holes at the marked points. The depth of the hole should be at least 1/4 inch deeper than the length of the wedge anchor being used. This allows for clear space for the expansion of the anchor. Make sure to keep the drill perpendicular to the surface to ensure straight holes.
Step 4 Clean the Holes
After drilling, it’s important to clean out the holes to remove any dust and debris that may interfere with the anchor's grip. You can use a vacuum or a wire brush to clear away the debris. This step is crucial for ensuring maximum holding strength.
Step 5 Insert the Wedge Anchors
Take the wedge anchors and insert them into the drilled holes. Make sure that the anchor reaches the proper depth into the concrete. If the anchor is equipped with a spacer or washer, place it as instructed by the manufacturer.
Step 6 Tighten the Lock Nut
Using a wrench or a socket, tighten the lock nut on the wedge anchor. As you tighten, the wedge will expand inside the hole, gripping the surrounding concrete. Be careful not to overtighten, as this could strip the threads or damage the concrete.
Step 7 Check for Stability
After the anchors have been secured, check the stability of the fixture. Ensure that there is no movement. If the fixture is securely anchored, you’re ready to proceed with the rest of your installation.
Conclusion
Installing a wedge anchor can be straightforward if you follow the right procedures. Ensure that you have all necessary tools ready, select the appropriate size anchors, and follow the steps to drill and secure them properly. By adhering to these guidelines, you can achieve a strong, durable bond between your fixtures and the concrete surface. Wedge anchors are a dependable solution for various anchoring needs, making them crucial for both professionals and DIY enthusiasts alike. Always prioritize safety and check local building codes to ensure the best practices in your anchoring projects.
-
Weatherproof Plastic Expansion Anchors for OutdoorNewsJun.06,2025
-
Sustainability in the Supply Chain: Eco-Friendly TEK Screws ProductionNewsJun.06,2025
-
Load-Bearing Capacity of External Insulation FixingsNewsJun.06,2025
-
Double Head Bolts: Enhancing Efficiency in Industrial MachineryNewsJun.06,2025
-
Corrosion Resistance in Chipboard Screws: Coatings for Wholesale DurabilityNewsJun.06,2025
-
Butterfly Toggle Bolts : Enhancing Structural ResilienceNewsJun.06,2025
