Le remplacement des plaquettes de frein à tambour est une opération cruciale pour garantir la sécurité de votre véhicule. Les freins à tambour, bien que moins courants sur les véhicules modernes, sont toujours utilisés sur de nombreux modèles, en particulier les voitures anciennes et certains véhicules utilitaires. Comprendre quand et comment remplacer ces plaquettes peut faire une grande différence en matière de performance et de sécurité.Tout d'abord, il est important de savoir quand les plaquettes de frein doivent être remplacées. Généralement, vous devriez inspecter les freins tous les 20 000 à 30 000 kilomètres ou dès que vous remarquez des signes d'usure, comme un bruit de grincement ou une diminution de l'efficacité du freinage. Un frottement anormal, une pédale de frein molle ou des vibrations lors du freinage peuvent également indiquer qu'un remplacement est nécessaire.Le processus de remplacement des plaquettes de frein à tambour peut être réalisé par soi-même, mais il nécessite quelques outils spécifiques, notamment un cric, des clés à molette, et un jeu de tournevis. Avant de commencer, assurez-vous d'avoir à portée de main des plaquettes neuves, car il est souvent conseillé de remplacer les deux côtés pour maintenir un équilibre dans le système de freinage.Commencez par lever le véhicule et retirer la roue. Une fois la roue enlevée, accédez au tambour de frein. Vous devrez probablement retirer quelques boulons pour pouvoir enlever le tambour. Inspectez l'état des plaquettes existantes et du tambour lui-même. Si le tambour est usé, il peut être nécessaire de le remplacer ou de le rectifier.Pour retirer les anciennes plaquettes, dévissez les attaches et retirez-les soigneusement. Installez les nouvelles plaquettes en veillant à respecter le bon positionnement. Remettez tout en place en vous assurant que tout est bien fixé. Terminez le processus en remettant la roue et en abaissant le véhicule.Avant de prendre la route, testez le système de freinage à basse vitesse pour vous assurer que tout fonctionne correctement. Un bon entretien des freins à tambour peut prolonger leur durée de vie et assurer votre sécurité sur la route. Si vous n'êtes pas à l'aise avec cette procédure, il est toujours recommandé de consulter un professionnel. N'oubliez pas que des freins en bon état sont essentiels pour la sécurité de tous les occupants du véhicule.
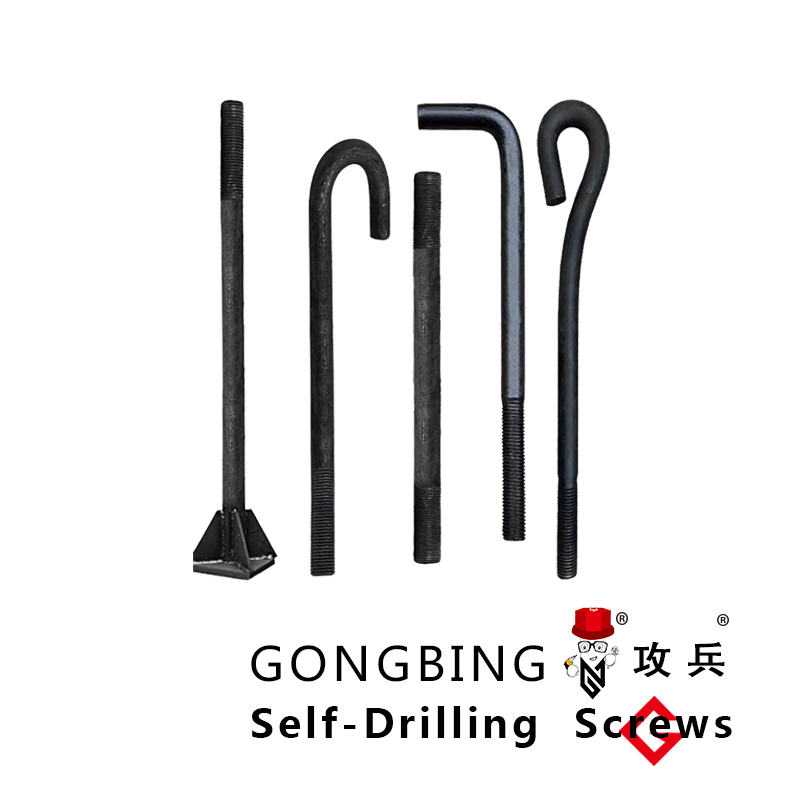

 It is essential to select the right type of anchor fastener based on the specific requirements of the project It is essential to select the right type of anchor fastener based on the specific requirements of the project


